Maintaining a healthy aquarium environment hinges on regular filter media replacement. This crucial task, often overlooked, is essential for preventing harmful toxins from accumulating and ensuring the well-being of your aquatic inhabitants. Proper replacement not only keeps your fish thriving but also preserves the overall health and beauty of your aquarium ecosystem.
This guide provides a step-by-step approach to replacing your aquarium filter media, covering everything from identifying your filter type to reintroducing the aquarium water. We’ll detail the necessary supplies, explain the importance of proper preparation, and guide you through the entire process with clarity and precision. Understanding the nuances of each step is vital for successful replacement and long-term aquarium health.
Introduction to Aquarium Filter Media Replacement

Regular replacement of aquarium filter media is crucial for maintaining a healthy and thriving aquatic environment. This process removes accumulated waste products, preventing harmful toxins from building up and negatively impacting the well-being of your fish and invertebrates. Proper filter media maintenance is essential for maintaining optimal water quality, promoting a balanced ecosystem, and supporting the long-term health of your aquarium inhabitants.Neglecting filter media replacement can lead to a cascade of detrimental effects.
Accumulated waste products, such as uneaten food, fish waste, and decaying plant matter, decompose and release harmful ammonia and nitrite into the water. Elevated levels of these toxins can cause significant stress, illness, and even death among aquarium residents. Consistent monitoring and timely replacement of filter media are therefore indispensable for preventing these potentially fatal consequences. A healthy aquarium ecosystem relies on a clean and efficient filtration system, which is directly tied to the regular replacement of filter media.Filter media acts as a crucial component of the aquarium’s biological filtration system.
It provides a surface area for beneficial bacteria to colonize, facilitating the breakdown of harmful ammonia and nitrite into less toxic nitrates. These bacteria are essential for maintaining a healthy nitrogen cycle, which is fundamental to the overall health and well-being of the aquarium inhabitants. This crucial process of transforming harmful substances into less harmful ones is a direct result of the presence and functionality of the filter media.
Filter Media Types and Replacement Frequencies
A variety of filter media types are available, each designed for specific purposes and exhibiting varying levels of effectiveness. Choosing the right media and understanding its appropriate replacement schedule is critical for maintaining optimal water quality.
| Filter Media Type | Replacement Frequency (Approximate) | Description |
|---|---|---|
| Mechanical Media (e.g., sponge, filter floss) | Weekly to Monthly | Removes particulate matter like uneaten food, debris, and dead organisms. These media are highly effective at capturing larger particles, and their replacement frequency depends on the aquarium’s bioload and the amount of waste produced. |
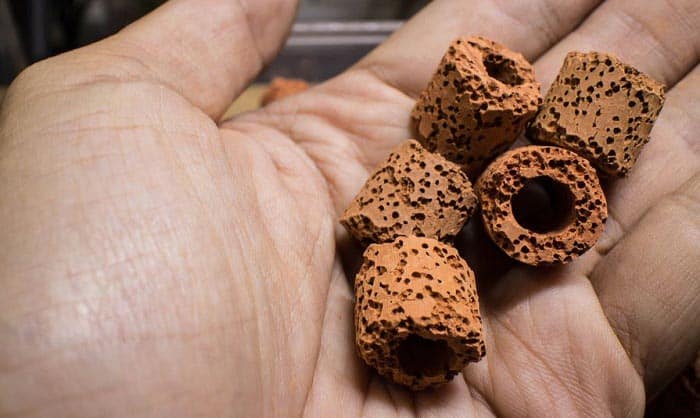
| Biological Media (e.g., ceramic rings, bio-balls) | 3-6 Months | Provides a large surface area for beneficial bacteria to thrive. The bacteria break down harmful ammonia and nitrite into less harmful nitrates. Replacement is less frequent than mechanical media, as the bacteria colonizing the media take time to establish. |
| Chemical Media (e.g., activated carbon, resins) | 1-3 Months | Removes specific chemical compounds from the water, such as chlorine, chloramine, and certain organic compounds. Their effectiveness diminishes over time, necessitating more frequent replacement. |
Maintaining the proper balance between these different media types and their respective replacement schedules is vital for the success of your aquarium. A well-maintained filtration system is a key element in ensuring the long-term health of your aquatic pets and environment.
Identifying Your Aquarium Filter
Proper identification of your aquarium filter is crucial for successful media replacement. Understanding the filter type, its internal components, and the various media types used allows for a precise and efficient replacement process, minimizing disruption to your aquarium’s ecosystem. This section will guide you through identifying your filter, locating its media compartments, and differentiating between different media types.Identifying your aquarium filter type is the first step in a successful media replacement.
This involves determining whether your filter is a canister, hang-on, or another type. The type of filter directly influences the location of the media compartments and the types of media used. Knowing the filter’s specifications, such as flow rate and capacity, is also important for selecting the appropriate replacement media.
Filter Type Identification
Different aquarium filter types have distinct structures and placements for media. This understanding is key to successful media replacement. Hang-on filters typically feature a compartment housing media at the back of the filter. Canister filters, often larger and more powerful, use a separate media chamber inside the filter body. Knowing the filter type enables precise location of media compartments.
Media Compartment Location
Locating the media compartments within your filter is essential for safe and efficient replacement. Specific instructions are usually included in the filter’s manual. The filter manual provides detailed diagrams and steps for accessing the filter media compartments. Failure to follow the manufacturer’s instructions may lead to damage to the filter. Always consult the user manual for specific instructions.
Media Type Differentiation
Various filter media types serve different purposes in an aquarium. Identifying these media types ensures appropriate replacement and avoids mixing incompatible media. Common types include ceramic rings, bio-balls, and filter sponges. Each type has a unique structure and function within the filtration process.
Filter Media Type Table
The following table summarizes common filter media types and their typical placement within the filter.
| Media Type | Description | Typical Placement |
|---|---|---|
| Filter Sponge | A porous material that traps debris and provides a surface for beneficial bacteria. | Often placed at the inlet of the filter. |
| Ceramic Media | Porous ceramic rings that provide a large surface area for bacterial colonization. | Often placed in a separate chamber or behind the sponge. |
| Bio-Balls | Hollow plastic spheres that provide a large surface area for beneficial bacteria. | Usually found in canister filters and other internal filter systems. |
Filter Specifications
Accurate record-keeping of your filter’s specifications is essential. This includes the flow rate and filter capacity. Flow rate indicates the volume of water the filter can process per hour, while filter capacity indicates the amount of water the filter can handle. Knowing these specifications ensures proper replacement of the media with compatible products. Using the correct filter media for your filter’s capacity ensures optimal filtration performance.
Mismatched filter media can lead to poor water quality. For example, a canister filter with a low flow rate might not effectively process the water volume for a large tank, necessitating a filter with higher flow rate.
Gathering Necessary Supplies
Proper preparation is key to a successful aquarium filter media replacement. Having the right tools and materials readily available will minimize stress on your fish and ensure a smooth process. A well-organized approach can prevent accidental damage to the aquarium and its inhabitants.
Essential Tools and Materials
A comprehensive list of supplies is crucial for a safe and efficient filter media replacement. These items are vital for maintaining the health of your aquarium ecosystem.
- Aquarium filter: This is the central component of the replacement process. Ensure you have the correct model for your aquarium.
- Replacement filter media: Choose media appropriate for your tank’s inhabitants and water parameters. For example, a heavily planted tank might require different media than a community tank.
- Clean, separate container for rinsing old media: This container should be large enough to hold the old media without spilling, and should be cleaned thoroughly beforehand to avoid introducing contaminants into the aquarium.
- Bucket or large container for rinsing and storing the new media (if necessary): This is particularly useful if the new media requires rinsing before installation.
- Pair of clean, latex or nitrile gloves: Protect your hands from chemicals and bacteria that may be present in the aquarium water.
- Small cup or spoon for carefully removing the old media: This tool allows for precise and controlled removal of the media without damaging the filter or the aquarium environment.
- Clean aquarium water: To rinse and thoroughly clean the old media and to prepare for replacing the water.
- Small towel or paper towels: Useful for drying or absorbing excess water.
Choosing the Right Filter Media
Selecting the correct filter media is critical to maintaining water quality and supporting the health of your aquarium’s inhabitants. Different types of media offer varying benefits, and choosing the right one can significantly impact the overall well-being of your aquatic community.
| Type of Media | Purpose | Considerations |
|---|---|---|
| Activated Carbon | Removes impurities and discoloration from the water | May remove beneficial substances; use cautiously |
| Biological Media (e.g., ceramic rings, bio-balls) | Provides a surface area for beneficial bacteria to thrive | Essential for maintaining a healthy nitrogen cycle |
| Mechanical Media (e.g., filter floss, sponges) | Removes larger particles from the water | Helps prevent clogs in other media and improves water clarity |
Pre-Cycled Filter Media
Pre-cycled filter media is a valuable asset in establishing a healthy nitrogen cycle in a new aquarium or after a significant change. Pre-cycled media contains beneficial bacteria already established, thus accelerating the nitrogen cycle and preventing ammonia spikes.
Using pre-cycled filter media significantly reduces the time required for the beneficial bacteria colony to develop in your aquarium.
For example, a new aquarium without pre-cycled media can take weeks to establish a healthy nitrogen cycle. Pre-cycled media can significantly shorten this time frame.
Importance of a Clean Rinse Container
A clean, separate container for rinsing the old filter media is essential to prevent the introduction of contaminants into the aquarium. Using a dedicated container helps maintain the cleanliness of the aquarium water, preventing potentially harmful substances from entering the tank.
Preparing the Aquarium
")
Proper preparation is crucial for a smooth and successful filter media replacement. This involves several key steps to ensure the safety and well-being of your aquatic inhabitants and maintain the stability of the aquarium ecosystem. Careful consideration of water parameters, media handling, and the introduction of new water is essential for a successful transition.
Preparing the Aquarium for Filter Media Replacement
To minimize stress on the fish and maintain a stable environment, carefully prepare the aquarium before the filter media replacement. First, turn off the filter and remove it from the aquarium. This step allows for better access to the filter media and prevents disruption of the water flow. Next, gently net out any fish that you plan to move to a separate container, like a quarantine tank.
This will protect them from stress and potential harm during the procedure. Finally, thoroughly clean the aquarium glass and any decorations. This removes any debris that might interfere with the replacement process and ensure that the water is clear for the new media.
Dechlorinating or Treating the Water
Tap water often contains chlorine and chloramines, which are harmful to fish. Before adding water to the aquarium, it is crucial to dechlorinate or treat the water. This step neutralizes these harmful substances, ensuring the safety of your aquatic pets. The best approach is to use a commercially available dechlorinator, which effectively removes chlorine and chloramines. Alternatively, water can be left to stand for a few days, allowing the chlorine to naturally dissipate.
The duration of standing water depends on the concentration of chlorine in your tap water. Always follow the manufacturer’s instructions for dechlorinators to ensure proper dosage.
Preparing the New Filter Media
Before installing the new filter media, prepare them appropriately. This will aid in the gradual reintroduction of beneficial bacteria and the establishment of a healthy nitrogen cycle. If the new filter media are ceramic or bio-balls, rinse them gently under running, dechlorinated water. This removes any manufacturing residue and helps to ensure that the water introduced into the aquarium remains clean and suitable for your aquatic inhabitants.
Avoid using harsh chemicals or detergents during this process, as they can harm the beneficial bacteria and disrupt the delicate balance of the aquarium ecosystem.
Testing Water Parameters
Regular water testing is crucial for monitoring the health of your aquarium. Before replacing the filter media, test the water parameters, including ammonia, nitrite, nitrate, pH, and hardness. This provides a baseline reading to compare against after the replacement. Testing water parameters after the filter media replacement is equally important. This step ensures that the water parameters have returned to a stable, healthy range.
Consistent monitoring helps to identify any potential problems early on and allows for prompt corrective action. If the parameters are outside the optimal range, adjust accordingly and monitor until the water parameters stabilize.
Maintaining Water Temperature Consistency
Maintaining a consistent water temperature is vital for the well-being of your aquatic pets. Fluctuations in temperature can stress fish and other aquatic animals. Ensure that the water used to replace the old water is at the same temperature as the existing water in the aquarium. If the water temperature is significantly different, use a thermometer to measure the temperature and adjust the water temperature gradually.
This prevents shock to the fish and allows them to acclimate to the new water parameters smoothly. Using a heater to maintain the desired temperature is recommended for optimal results.
Removing and Cleaning the Old Filter Media
Properly removing and cleaning old filter media is crucial for maintaining a healthy aquarium environment. Improper handling can introduce harmful substances into the water, disrupting the delicate balance and potentially stressing or harming your fish and other inhabitants. This section details the safe procedures for removing and cleaning your filter media, minimizing any potential risks.Removing old filter media involves a methodical approach to prevent introducing contaminants into the aquarium.
Carefully following the steps Artikeld will ensure a smooth transition, minimizing stress on the ecosystem. Cleaning the media effectively removes accumulated debris, restoring its filtering efficiency and prolonging its lifespan.
Safe Removal of Old Filter Media
Effective removal of old filter media is vital to prevent the release of unwanted substances into the aquarium water. Using appropriate tools and techniques minimizes disturbance to the aquarium environment. This section Artikels the steps involved in a safe and controlled manner.
- Turn off the filter pump and disconnect the power cord to prevent any electrical hazards.
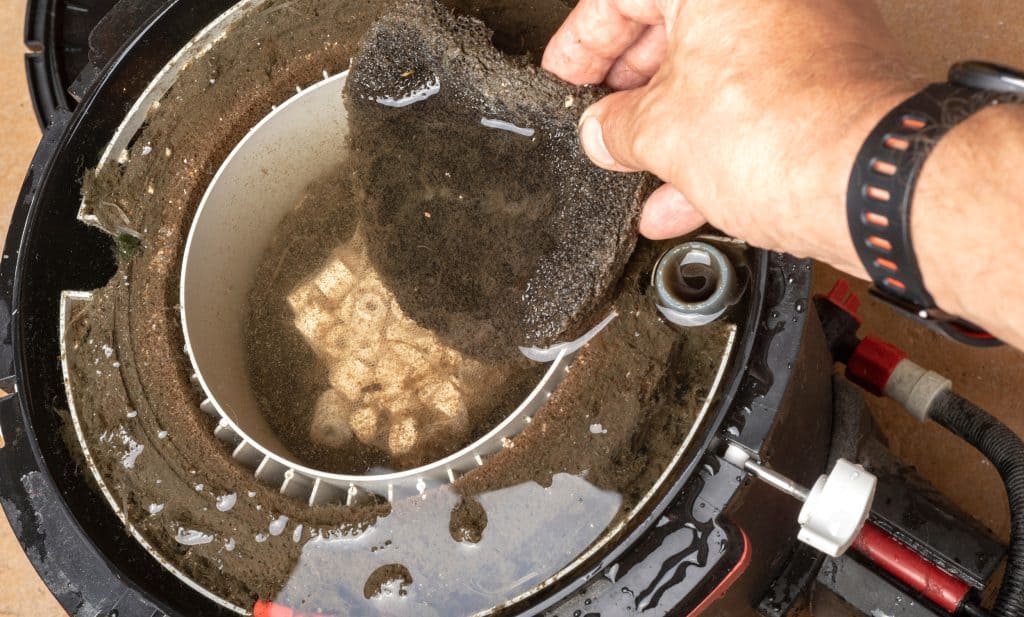
- Carefully remove the filter media basket or container from the filter housing. Take note of the filter media placement within the basket to facilitate reinstallation.
- Gently remove the filter media from the filter housing. Avoid squeezing or crushing the media, as this can release trapped debris and potentially harmful substances.
- Place the removed filter media in a separate, clean container to prevent cross-contamination with the aquarium water.
Cleaning the Old Filter Media
Cleaning the old filter media effectively removes accumulated debris and contaminants, restoring its filtering capacity and preventing the buildup of harmful substances. Rinsing techniques are vital for this process.
- Using a clean container, rinse the filter media under a gentle stream of aquarium-safe water. Avoid using tap water, as it may contain chlorine or other harmful chemicals that could be detrimental to your aquarium.
- Rinse the media thoroughly to remove any visible debris or particles. Repeated rinsing is often necessary to ensure a complete removal of contaminants.
- For heavily soiled or bio-fouled media, you may consider using a very mild, aquarium-safe cleaning solution to help remove stubborn deposits. Always ensure the cleaning solution is compatible with your aquarium inhabitants.
- After cleaning, rinse the media again with clean aquarium water to remove any residue from the cleaning solution.
Preventing Release of Unwanted Substances
Preventing the release of unwanted substances during media removal and cleaning is paramount for the health of your aquarium. Implementing these precautions will minimize stress on your aquarium’s delicate ecosystem.
- Avoid agitation or excessive handling of the filter media to prevent the release of trapped contaminants.
- Use a clean container for holding the removed filter media to prevent cross-contamination with the aquarium water.
- Rinse the media thoroughly to remove as much debris as possible before returning it to the filter.
- Maintain a consistent water flow and avoid sudden changes in water parameters during the media replacement process.
Proper Disposal of Old Filter Media
Proper disposal of old filter media is essential for preventing the spread of unwanted organisms or contaminants. Appropriate disposal practices safeguard the environment.
- Dispose of the used filter media in a manner that does not introduce it to the local water system.
- Do not flush used filter media down the drain as this can introduce contaminants into the sewage system.
- Consider composting or other environmentally friendly disposal methods.
Potential Issues from Improper Media Removal and Cleaning
Improper procedures during filter media removal and cleaning can lead to a range of negative consequences. Understanding the potential issues is key to maintaining a healthy aquarium environment.
| Issue | Description | Impact |
|---|---|---|
| Release of contaminants | Trapped debris and organic matter can be released into the aquarium water. | Potentially harmful to fish and other inhabitants. |
| Water quality degradation | Improper cleaning can introduce pollutants, leading to poor water quality. | Stress on fish and other inhabitants, potential disease outbreaks. |
| Increased bacterial growth | Insufficient cleaning can lead to the proliferation of harmful bacteria in the filter media. | Deterioration of water quality, potentially harming the aquarium ecosystem. |
| Mechanical damage | Squeezing or crushing filter media can cause physical damage, reducing its filtering capacity. | Reduced effectiveness of the filter, potentially impacting water quality. |
Installing the New Filter Media
Proper installation of new filter media is crucial for maintaining optimal water quality and ensuring the longevity of your aquarium’s filtration system. Incorrect placement can impede water flow, reduce filter efficiency, and potentially harm your aquatic inhabitants. Following the manufacturer’s instructions is paramount for achieving the desired filtration outcomes.Careful attention to the installation process, particularly in relation to water flow, is vital for a healthy aquarium environment.
This section will detail the steps for installing new filter media in various filter types, emphasizing the importance of correct placement and water flow.
Canister Filter Media Installation
Installing filter media in a canister filter requires a methodical approach. The filter media’s placement within the canister affects its filtration effectiveness.
- Media Placement Order: Begin by placing the filter media according to the manufacturer’s instructions. This usually involves starting with the largest filter media pieces at the bottom and progressively using finer media towards the top. The sequence often involves mechanical, biological, and chemical media. This layering allows for efficient filtration at various stages.
- Water Flow: Ensure that the water flows correctly through the filter media. Obstructions or improper placement can disrupt the flow, leading to inefficient filtration. Observe the flow pattern from the inlet to the outlet to confirm proper direction and adequate flow.
- Securing the Media: Once the media is placed correctly, secure it in the canister. Overly loose media may shift during operation, leading to filter malfunction and potentially damaging the filter’s components.
Hang-on-Back Filter Media Installation
Hang-on-back filters typically have a straightforward media installation process.
- Media Placement: Place the filter media according to the manufacturer’s instructions. Typically, a layer of coarse mechanical media is placed at the bottom followed by biological media, and finally, chemical media at the top. This arrangement optimizes the filtration stages.
- Media Placement Considerations: Some hang-on-back filters may have specific compartments or areas for placing the media. Be sure to follow the filter manufacturer’s directions carefully. Avoid overcrowding or using excessive media quantities.
- Water Flow Check: Ensure that water flows freely through the filter media. Any blockage or impediment can reduce the effectiveness of the filtration process. Monitor the flow rate to ensure it remains within the expected range.
Internal Filter Media Installation
Internal filters often have a relatively simple media installation process.
- Media Placement: Generally, internal filters utilize a single compartment or a series of compartments. Follow the manufacturer’s instructions for proper media placement. The specific sequence of media types depends on the filter’s design and the desired filtration results.
- Flow Direction: Ensure the water flows through the media in the correct direction. The filter’s design typically dictates the flow path. Incorrect flow can negatively impact filtration efficiency.
- Media Capacity: Do not overfill the filter with media. Overfilling can impede water flow and negatively affect filtration. Adhere to the manufacturer’s guidelines for optimal media loading.
Reintroducing the Aquarium Water
Returning the aquarium water after filter media replacement is a crucial step. Proper reintroduction minimizes stress on the aquatic inhabitants and ensures a smooth transition back to a stable environment. This process involves careful attention to water parameters and gradual addition to avoid shock to the fish and other organisms.The reintroduction process requires a deliberate and measured approach to ensure a safe and comfortable environment for the aquarium inhabitants.
The gradual addition of water helps to avoid sudden fluctuations in water parameters, which can be detrimental to the health of the fish. Accurate monitoring of water parameters and careful observation of the fish are essential to identify any potential problems early on.
Gradual Water Reintroduction
A gradual addition of water minimizes stress on the fish and other inhabitants. Adding water too quickly can cause significant fluctuations in temperature, pH, and other parameters, potentially leading to fish stress or illness. The key is to add water slowly, allowing the aquarium’s existing water to absorb the new water, thus mitigating these fluctuations. This process also helps to ensure that the new water gradually blends with the existing water, avoiding sudden changes in water chemistry.
Monitoring Water Parameters
Careful monitoring of water parameters before and after reintroduction is essential. Variations in water parameters can negatively impact the health and well-being of the aquatic inhabitants. Regularly checking temperature and pH levels helps to ensure that the parameters remain within the acceptable ranges for the specific species of fish or other organisms present in the aquarium.
Temperature and pH Checks
Precisely measuring the temperature and pH levels before and after the reintroduction process is crucial. Use a reliable thermometer and pH testing kit to obtain accurate readings. Note the initial values of both temperature and pH. After reintroducing the water, monitor the parameters again. Maintaining consistent temperature and pH levels is vital for the health and well-being of the fish and other inhabitants.
For example, a sudden drop in pH can lead to stress, fin rot, or other health issues. A sudden increase in temperature can cause overheating and potentially kill the inhabitants.
Observing Fish Behavior
Closely observing the fish and other aquatic inhabitants for any signs of stress or discomfort after the water reintroduction is crucial. Changes in behavior, such as loss of appetite, lethargy, or erratic swimming, may indicate that the reintroduction process was too abrupt or that the water parameters have shifted outside the acceptable range. Observing these behaviors helps in identifying potential issues early on and taking corrective measures promptly.
For instance, if the fish are exhibiting erratic swimming, it may be an indicator that the water parameters are not stable. Constant vigilance during this period is vital for maintaining a healthy aquarium environment.
Detailed Steps for Reintroducing Water
- Begin by checking the temperature and pH of both the new and existing aquarium water. Ensure that the difference in these parameters is minimal.
- Carefully add small amounts of the new water to the aquarium, allowing the existing water to absorb it. Use a slow and controlled pour.
- Monitor the temperature and pH levels continuously as you add water. Record the readings to ensure a smooth transition.
- Observe the fish and other inhabitants for any signs of stress, such as erratic swimming, loss of appetite, or lethargy. Adjust the reintroduction process if necessary.
- Repeat steps 2-4 until all the new water has been added.
Post-Replacement Care

Following the meticulous process of replacing your aquarium filter media, a crucial stage remains: post-replacement care. This phase ensures a smooth transition and a healthy recovery for your aquatic inhabitants. Proper monitoring and attentive care are vital to maintain a stable and thriving aquarium environment.Careful observation and adjustments are necessary to ensure the well-being of your aquarium’s inhabitants after the filter media replacement.
This stage requires vigilance to identify and address any potential issues that may arise from the change in the aquarium’s environment.
Monitoring Water Parameters
A crucial aspect of post-replacement care is diligent monitoring of water parameters. Significant changes in water chemistry can stress your fish and invertebrates, potentially leading to illness. Maintaining stable conditions is essential for their health and well-being. This involves regular testing of ammonia, nitrite, nitrate, pH, and temperature.Monitoring should be performed frequently for at least a week after the replacement.
Record your readings to establish a baseline and to identify any deviations from the expected range. Comparing these readings with those taken before the replacement is important for understanding any potential changes.
Addressing Potential Issues
Should any significant changes in water parameters be observed, immediate action is required. If ammonia or nitrite levels rise above zero, it indicates that the nitrogen cycle is disrupted. In such cases, consider introducing a beneficial bacteria starter to jumpstart the cycle. If the pH is significantly outside the optimal range for your species, you may need to perform partial water changes to adjust the pH gradually.
Temperature fluctuations can also affect your fish. Maintain a stable temperature, as sudden changes can be detrimental to their health.
Providing Appropriate Care
The well-being of your aquarium inhabitants should be prioritized. Observe their behavior closely. Any signs of lethargy, loss of appetite, or unusual swimming patterns may indicate stress or illness. Provide a calm environment and minimize any disturbance to reduce stress. If problems persist, consult a veterinarian specializing in aquatic animals for professional guidance.
Maintaining a Healthy Environment
Maintaining a healthy aquarium environment is a continuous process. Regular maintenance, including regular water changes, is crucial for overall water quality. Overstocking should be avoided to prevent stress and competition for resources. Consistent monitoring of your aquarium will ensure that your aquatic community thrives in a stable environment.
Closing Notes
In conclusion, replacing aquarium filter media is a vital aspect of responsible aquarium ownership. By following the comprehensive steps Artikeld in this guide, you can maintain a pristine and thriving aquatic environment. Remember, meticulous preparation, careful handling, and consistent monitoring are key to a successful replacement process. By understanding the importance of each step, you ensure a healthy and happy aquatic ecosystem for your beloved fish and other inhabitants.